
Table of content
- Excel file with Kotlin | Apache POI
- Apache POI famous Terms
- Write Excel in Kotlin
- Read Excel in Kotlin
- Retrieving Cell values by CellType
- Read all values from a specific Column
In every Development environment, data is a mandatory part of their development, we put all your data in your program files. But if any change in data results in the editing of the program file, which makes us recompile the code and retest the compiled code.
If data Changes every day, are we going to edit the program file every day?
What happens if the compilation fails ?
Development should happen in such that data do not have any effect on the program files. Placing data outside the program is the only way to do it, like placing the data on excel files, property files, config file, Json Files, Xml files.
Apache POI :
Apache POI helps Kotlin/Java related technologies to read and write Excel files on different platforms, Using apache poi we can do read and write operation of both xls and xlsx file formats. Apache poi is an open-source tool developed by Apache.
Apache POI will be helpful to modify the large content of data. Below is the step by step process to download Apache poi jar files.
Follow below steps to download Apache Poi:
1. Open https://poi.apache.org/download.html
2. Click Downloads section on right side
3. Click on the poi-bin-#####.zip link under binary distribution section
4. Click on the mirror link, apache would be suggesting the nearest location for your mirror link
5. Your poi files will be started to download
6. Extract the downloaded zip file
7. The extracted folder should contain below files.
Steps for adding Apache POI jars in IntelliJ IDEA:
- Click File from the toolbar
- Project Structure (CTRL + SHIFT + ALT + S on Windows/Linux)
- Select Modules at the left panel
- Dependencies tab
- ‘+’ → JARs or directories and add all jar files to IntelliJ
Apache Commons CSV Integration
Apache POI excel library revolves around four key interfaces which actually represent the items in the excel file.
- Workbook: A workbook represents the excel file
- Sheet: A workbook may contain many sheets. We can access the sheets either with a name or with index.
- Row: As the name suggests, It represents a row in the sheet.
- Cell: A cell represents a column in the sheet.
For writing excel file in kotlin the steps are simple, we would be writing an xlsx file in this example.
- Create an Object for XSSFWorkbook(), which will create excel file in JVM
- Create Sheet object from workbook object(xlWb) using createSheet() function
- Create a row from the Workbook sheet object(xlWb) using createRow(rowNumber), pass the which row number you want to create
- Create a Cell inside the row using createCell() function, pass the cell number as a parameter
- Set the value of the cell that you have created using the setCellValue(«value to set») function
- Now we have to move the Excel file created inside JVM into local file system using FileOutputStream
fun main(args: Array<String>) {
    val filepath = "./test_file.xlsx"
    //Instantiate Excel workbook:
    val xlWb = XSSFWorkbook()
    //Instantiate Excel worksheet:
    val xlWs = xlWb.createSheet()
    //Row index specifies the row in the worksheet (starting at 0):
    val rowNumber = 0
    //Cell index specifies the column within the chosen row (starting at 0):
    val columnNumber = 0
    //Write text value to cell located at ROW_NUMBER / COLUMN_NUMBER:
    val xlRow = xlWs.createRow(rowNumber)
    val xlCol = xlRow.createCell(columnNumber)
    xlCol.setCellValue("Chercher Tech")
    //Write file:
    val outputStream = FileOutputStream(filepath)
    xlWb.write(outputStream)
    xlWb.close()
}
Write Properties File
- <li»>To read any file we have to bring the file from Local system to JVM, use
FileInputStream()
- object to bring the excel file into JVM <li»>Read the file as excel file using the
WorkbookFactory.create()
- , because sometimes you may have xlsx or xls, so to avoid issues we would be using the Workbookfactory.Create() <li»>Get the sheet we want to read using
getSheetAt(«index/name»)
- function, we can get the sheet either using the name or by index, the index starts from 0 <li»>Get the row using
getRow(rowNumber)
- from the sheet object and pass the row number you want to read s parameter <li»>Get the cell number from the row using the
getCell(columnNumber)
- function and print it
fun main(args: Array<String>) {
    val filepath = "./test_file.xlsx"
    val inputStream = FileInputStream(filepath)
    //Instantiate Excel workbook using existing file:
    var xlWb = WorkbookFactory.create(inputStream)
    //Row index specifies the row in the worksheet (starting at 0):
    val rowNumber = 0
    //Cell index specifies the column within the chosen row (starting at 0):
    val columnNumber = 0
    //Get reference to first sheet:
    val xlWs = xlWb.getSheetAt(0)
    println(xlWs.getRow(rowNumber).getCell(columnNumber))
}
KProperty in kotlin
We can retrieve cell value using stringCellValue method but it only works for String values. In actual, day to day activities, we may store more types of data in excel sheets like Number, boolean, strings.
We have different properties to retrieve different types of data in apache poi
To retrieve different data, you may check each cell’s type and then retrieve its value using various type-specific methods.
You should understand that below properties will not extract a type of data from the cell when you store a particular data type in the cell then the total cell is of that type
So these properties will fetch total value present in the cell
- booleanCellValue — To fetch boolean data from the excel
- stringCellValue — To fetch String data from the excel
- dateCellValue — fetches date values from the cell
- numericCellValue — fetches numeric value
- cellFormula — fetches the data from the formula cell.
fun main(args: Array<String>) {
    val filepath = "./test_file.xlsx"
    val inputStream = FileInputStream(filepath)
    //Instantiate Excel workbook using existing file:
    var xlWb = WorkbookFactory.create(inputStream)
    //Row index specifies the row in the worksheet (starting at 0):
    val rowNumber = 0
    //Cell index specifies the column within the chosen row (starting at 0):
    val columnNumber = 0
    //Get reference to first sheet:
    val xlWs = xlWb.getSheetAt(0)
    var cell = xlWs.getRow(rowNumber).getCell(columnNumber)
    when (cell.getCellTypeEnum()) {
        CellType.BOOLEAN -> println("Boolean value found : "+cell.booleanCellValue)
        CellType.STRING -> println("String value found : "+cell.stringCellValue)
        CellType.NUMERIC -> if (DateUtil.isCellDateFormatted(cell)) {
            println("Date value found : "+cell.dateCellValue)
            } else {
            println("Numeric value found : "+cell.numericCellValue)
            }
        CellType.FORMULA -> println("Formula value found : "+cell.getCellFormula())
        else -> print("")
    }
}
Append content in kotlin
We can fetch all the data from a specific column in apache poi, here we should not change the column number. The column is specified by the cell in apache POI. We have our column number ready but we have to get the number of rows present in the excel sheet so that we would know how much we have to iterate.
For going through every row in the excel sheet we have to create rowIterator() for the excel sheet
We have all rows now, let’s get the data based on the cell/Column number. In ‘E’ column I have store months, let’s retrieve it. E column would have an index number as 4.
fun main(args: Array) {
    val filepath = "./test_file.xlsx"
    val inputStream = FileInputStream(filepath)
    //Instantiate Excel workbook using existing file:
    var xlWb = WorkbookFactory.create(inputStream)
    //Row index specifies the row in the worksheet (starting at 0):
    val rowNumber = 0
    //Cell index specifies the column within the chosen row (starting at 0):
    val columnNumber = 0
    //Get reference to first sheet:
    val xlWs = xlWb.getSheetAt(0)
    val xlRows = xlWs.rowIterator()
	// go row by row to get the values and print them
    xlRows.forEach { row -> println(row.getCell(4))}
}
Using While Loop
I hope you know that the last row number would give us the number of rows present in the excel.
We can get number of rows using the lastRowNumber property from Cell object and we can use the while loop to get all the values
fun main(args: Array) {
    val filepath = "./test_file.xlsx"
    val inputStream = FileInputStream(filepath)
    //Instantiate Excel workbook using existing file:
    var xlWb = WorkbookFactory.create(inputStream)
    //Row index specifies the row in the worksheet (starting at 0):
    val rowNumber = 0
    //Cell index specifies the column within the chosen row (starting at 0):
    val columnNumber = 0
    //Get reference to first sheet:
    val xlWs = xlWb.getSheetAt(0)
    val xlRows = xlWs.lastRowNum
    var i=0;
    while (i<= xlRows){
        println(xlWs.getRow(i).getCell(4))
        i++
    }
}
0 results
ExcelKt
An idiomatic Kotlin wrapper over the Apache POI Excel library for easily generating Excel xlsx files.
Key Features
- Write idiomatic kotlin that looks clean and logical
- Simple style system that allows you to use the Apache POI CellStyle system to stylize workbooks, sheets, rows, or specific cells
- Very lightweight
Installation
Gradle
In your gradle build file add the following:
Kotlin DSL
repositories {
    mavenCentral()
}

dependencies {
    implementation("io.github.evanrupert:excelkt:1.0.2")
}
Groovy DSL
repositories {
    mavenCentral()
}

dependencies {
    implementation 'io.github.evanrupert:excelkt:1.0.2'
}
Maven
In your pom.xml file make sure you have the following in your repositories:
<repository>
    <id>mavenCentral</id>
    <url>https://repo1.maven.org/maven2/</url>
</repository>
Then add the following to your dependencies:
<dependency>
    <groupId>io.github.evanrupert</groupId>
    <artifactId>excelkt</artifactId>
    <version>1.0.2</version>
</dependency>
Legacy Installation
For older versions of ExcelKt (v0.1.2 and before), which run on kotlin version 1.3.x and apache poi version 3.9, add the following to your gradle build file:
Kotlin DSL
repositories {
    jcenter()
    maven(url = "https://jitpack.io")
}

dependencies {
    implementation("com.github.EvanRupert:ExcelKt:v0.1.2")
}
Groovy DSL
repositories {
    jcenter()
    maven { url 'https://jitpack.io' }
}

dependencies {
    implementation 'com.github.evanrupert:excelkt:v0.1.2'
}
And use import excelkt.* instead of import io.github.evanrupert.excelkt.*
Quick Example
import io.github.evanrupert.excelkt.*
import org.apache.poi.ss.usermodel.FillPatternType
import org.apache.poi.ss.usermodel.IndexedColors

data class Customer(
    val id: String,
    val name: String,
    val address: String,
    val age: Int
)

fun findCustomers(): List<Customer> = listOf(
    Customer("1", "Robert", "New York", 32),
    Customer("2", "Bobby", "Florida", 12)
)

fun main() {
    workbook {
        sheet {
            row {
                cell("Hello, World!")
            }
        }

        sheet("Customers") {
            customersHeader()

            for (customer in findCustomers())
                row {
                    cell(customer.id)
                    cell(customer.name)
                    cell(customer.address)
                    cell(customer.age)
                }
        }

    }.write("test.xlsx")
}

fun Sheet.customersHeader() {
    val headings = listOf("Id", "Name", "Address", "Age")

    val headingStyle = createCellStyle {
        setFont(createFont {
            fontName = "IMPACT"
            color = IndexedColors.PINK.index
        })

        fillPattern = FillPatternType.SOLID_FOREGROUND
        fillForegroundColor = IndexedColors.AQUA.index
    }

    row(headingStyle) {
        headings.forEach { cell(it) }
    }
}
Supported cell data types
Cells support the following content types:
- Formula
- Boolean
- Number
- Date
- Calendar
- LocalDate
- LocalDateTime
All other types will be converted to strings.
Example of all data types in use:
row {
    cell(Formula("A1 + A2"))
    cell(true)
    cell(12.2)
    cell(Date())
    cell(Calendar.getInstance())
    cell(LocalDate.now())
    cell(LocalDateTime.now())
}
Note on Dates
By default, dates will display as numbers in Excel. In order to display them correctly, create a cell style with the dataFormat set to your preferred format. See the following example:
row {
    val cellStyle = createCellStyle {
        dataFormat = xssfWorkbook.creationHelper.createDataFormat().getFormat("m/d/yy h:mm")
    }

    cell(Date(), cellStyle)
}
Содержание
- How to Generate Excel Files with Kotlin
- Getting started with GcExcel and Kotlin
- Step 1:
- Step 2:
- Step 3:
- Step 4:
- Step 5:
- Step 6:
- Step 7:
- Step 8:
- Step 9:
- More about GcExcel on Kotlin
- evanrupert/ExcelKt
- Sign In Required
- Launching GitHub Desktop
- Launching GitHub Desktop
- Launching Xcode
- Launching Visual Studio Code
- Latest commit
- Git stats
- Files
- README.md
- About
- Read & Write Excel in Kotlin | Apache POI
- Excel file with Kotlin | Apache POI
- Apache POI :
- 4sh/retable
- Sign In Required
- Launching GitHub Desktop
- Launching GitHub Desktop
- Launching Xcode
- Launching Visual Studio Code
- Latest commit
- Git stats
- Files
- README.md
- Русские Блоги
- Upload Or Download Excel(.xls/.xlsx) File In Kotlin II
- Интеллектуальная рекомендация
- Проверка полномочий на основе JWT и фактические боевые учения
- [Android Development Fast Getsing] Запустите стойку регистрации приложения для подсказки для тостов
- Установите Raspberry Pi из Raspberry Pi в беспроводной маршрутизатор (Wi -Fi Hotspot AP, RTL8188CUS Chip)
- [Серия исходного кода Java] строка (2) Проблема нового, а не новой
- 05-Vue News Mobile Project
- Вам также может понравиться
- 1008 Рассматривая задача Element Element Cycle (20 баллов)
- Linux centos7 виртуальная машина установить Docker (5) —. Netcore
- Разработать интерфейс мониторинга состояния здоровья
- [Реабилитация] #C Language Array Joseph Проблема
How to Generate Excel Files with Kotlin
Over the past few years, Kotlin is gaining popularity over Java as an alternative language, being as versatile as it’s predecessor. A statically-typed programming language running on the Java Virtual Machine (JVM), Kotlin combines both object- oriented and functional programming styles, solving some of the flaws in Java, and is proving to be the most preferred language for Android development.
The main reason to use Kotlin is because it is compatible with Java. All libraries/frameworks from Java can be used in Kotlin, including advanced frameworks. No major steps (like converting projects are required), so one does not have to learn a new language.
Last year, we released GrapeCity Documents for Excel — Java Edition (GcExcel). The library is a high-speed, feature-rich Excel document API based on VSTO that helps to generate, convert, calculate, format, and parse spreadsheets in any application. The feature set helps you work with a variety of features like importing spreadsheets, calculate data, query, generate, and export any spreadsheet, add sorting, filtering, formatting, conditional formatting and validate data, add grouping, sparklines, charts, shapes, pictures, slicers, comments, hyperlinks, and themes.
In addition, you can import existing Excel templates, add data and save the spreadsheets back. You can also use GrapeCity Documents for Excel together with Spread.Sheets, another Spread product that is included in GrapeCity SpreadJS.
Being a Java API, GcExcel is fully compatible with Kotlin. See GcExcel sample browser to view samples running with Kotlin.
This guide will help you get started with GcExcel and Kotlin.
Getting started with GcExcel and Kotlin
Step 1:
Open IntelliJ IDE.
Step 2:
Create new project.
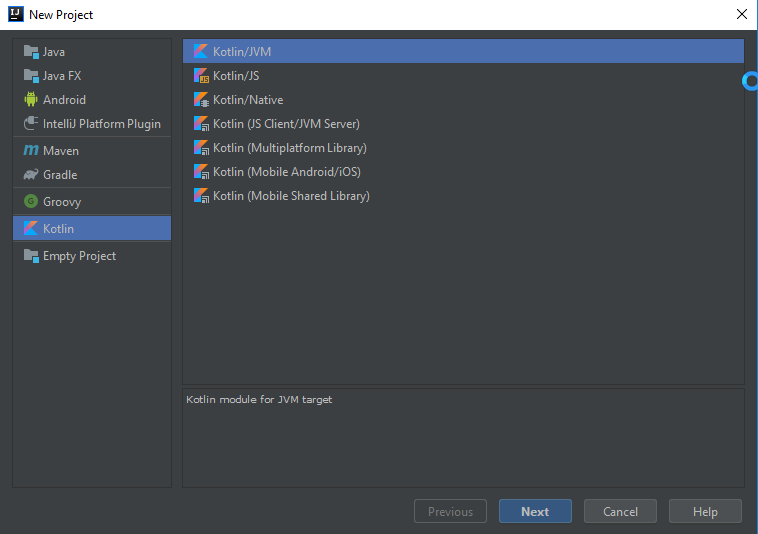
Step 3:
In the left pane, choose ‘Kotlin’ and in the right pane that opens, choose ‘Kotlin/JVM.’
Step 4:
Give title to the project and click ‘Finish.’
Step 5:
In the ‘src’ folder, create ‘libs’ folder and place gcexcel-2.2.0.jar in it.
Step 6:
Right-click ‘libs’ in the IDE and choose ‘Add as library.’
Step 7:
In ‘src’ folder, right-click and add new Kotlin class file, name it ‘Main.kt’.
Step 8:
Type following code in Main.kt:
a. Import necessary packages:
b. Create the main function, add code to generate the workbook and add data to it:
Step 9:
Run the project.
You have generated an Excel file with Kotlin.
More about GcExcel on Kotlin
To view more demos of GcExcel features with Kotlin, refer to the GcExcel Java sample browser.
Источник
evanrupert/ExcelKt
Use Git or checkout with SVN using the web URL.
Work fast with our official CLI. Learn more.
Sign In Required
Please sign in to use Codespaces.
Launching GitHub Desktop
If nothing happens, download GitHub Desktop and try again.
Launching GitHub Desktop
If nothing happens, download GitHub Desktop and try again.
Launching Xcode
If nothing happens, download Xcode and try again.
Launching Visual Studio Code
Your codespace will open once ready.
There was a problem preparing your codespace, please try again.
Latest commit
Git stats
Files
Failed to load latest commit information.
README.md
An idiomatic Kotlin wrapper over the Apache POI Excel library for easily generating Excel xlsx files.
- Write idiomatic kotlin that looks clean and logical
- Simple style system that allows you to use the Apache POI CellStyle system to stylize workbooks, sheets, rows, or specific cells
- Very lightweight
In your gradle build file add the following:
In your pom.xml file make sure you have the following in your repositories :
Then add the following to your dependencies :
For older versions of ExcelKt ( v0.1.2 and before), which run on kotlin version 1.3.x and apache poi version 3.9 , add the following to your gradle build file:
And use import excelkt.* instead of import io.github.evanrupert.excelkt.*
Supported cell data types
Cells support the following content types:
All other types will be converted to strings.
Example of all data types in use:
By default, dates will display as numbers in Excel. In order to display them correctly, create a cell style with the dataFormat set to your preferred format. See the following example:
About
Kotlin Wrapper over the Apache POI Excel Library that enables creating xlsx files with kotlin builders
Источник
Read & Write Excel in Kotlin | Apache POI
Excel file with Kotlin | Apache POI
In every Development environment, data is a mandatory part of their development, we put all your data in your program files. But if any change in data results in the editing of the program file, which makes us recompile the code and retest the compiled code.
If data Changes every day, are we going to edit the program file every day?
What happens if the compilation fails ?
Development should happen in such that data do not have any effect on the program files. Placing data outside the program is the only way to do it, like placing the data on excel files, property files, config file, Json Files, Xml files.
Please enable JavaScript
Apache POI :
Apache POI helps Kotlin/Java related technologies to read and write Excel files on different platforms, Using apache poi we can do read and write operation of both xls and xlsx file formats. Apache poi is an open-source tool developed by Apache.
Apache POI will be helpful to modify the large content of data. Below is the step by step process to download Apache poi jar files.
Follow below steps to download Apache Poi:
1. Open https://poi.apache.org/download.html
2. Click Downloads section on right side
3. Click on the poi-bin-#####.zip link under binary distribution section
4. Click on the mirror link, apache would be suggesting the nearest location for your mirror link
5. Your poi files will be started to download
6. Extract the downloaded zip file
7. The extracted folder should contain below files.%3C/li%3E%3Cli%3ESelect%20Modules%20at%20the%20left%20panel%3C/li%3E%3Cli%3EDependencies%20tab%3C/li%3E%3Cli%3E%E2%80%98+%E2%80%99%20%E2%86%92%20JARs%20or%20directories%20and%20add%20all%20jar%20files%20to%20IntelliJ%3C/li%3E%3C/ul%3E%3Ch2%3EApache%20POI%20famous%20Terms%3C/h2%3E%3Cp%3EApache%20POI%20excel%20library%20revolves%20around%20four%20key%20interfaces%20which%20actually%20represent%20the%20items%20in%20the%20excel%20file.%20%3C/p%3E%3Cul%3E%3Cli%3EWorkbook:%20A%20workbook%20represents%20the%20excel%20file%3C/li%3E%3Cli%3ESheet:%20A%20workbook%20may%20contain%20many%20sheets.%20We%20can%20access%20the%20sheets%20either%20with%20a%20name%20or%20with%20index.%3C/li%3E%3Cli%3ERow:%20As%20the%20name%20suggests,%20It%20represents%20a%20row%20in%20the%20sheet.%3C/li%3E%3Cli%3ECell:%20A%20cell%20represents%20a%20column%20in%20the%20sheet.%3C/li%3E%3C/ul%3E%3Ch2%3EWrite%20Excel%20in%20Kotlin%3C/h2%3E%3Cp%3EFor%20writing%20excel%20file%20in%20kotlin%20the%20steps%20are%20simple,%20we%20would%20be%20writing%20an%20xlsx%20file%20in%20this%20example.%20%3C/p%3E%3Cul%3E%3Cli%3ECreate%20an%20Object%20for%20XSSFWorkbook()%20,%20which%20will%20create%20excel%20file%20in%20JVM%3C/li%3E%3Cli%3ECreate%20Sheet%20object%20from%20workbook%20object(xlWb)%20using%20createSheet()%20function%3C/li%3E%3Cli%3ECreate%20a%20row%20from%20the%20Workbook%20sheet%20object(xlWb)%20using%20createRow(rowNumber)%20,%20pass%20the%20which%20row%20number%20you%20want%20to%20create%3C/li%3E%3Cli%3ECreate%20a%20Cell%20inside%20the%20row%20using%20createCell()%20function,%20pass%20the%20cell%20number%20as%20a%20parameter%3C/li%3E%3Cli%3ESet%20the%20value%20of%20the%20cell%20that%20you%20have%20created%20using%20the%20setCellValue(%C2%ABvalue%20to%20set%C2%BB)%20function%3C/li%3E%3Cli%3ENow%20we%20have%20to%20move%20the%20Excel%20file%20created%20inside%20JVM%20into%20local%20file%20system%20using%20FileOutputStream%3C/li%3E%3C/ul%3E%3Cdiv%20style=)
Read Excel in Kotlin
- To read any file we have to bring the file from Local system to JVM, use
- Read the file as excel file using the
- object to bring the excel file into JVM
WorkbookFactory.create()
- Get the sheet we want to read using
- , because sometimes you may have xlsx or xls, so to avoid issues we would be using the Workbookfactory.Create()
getSheetAt(«index/name»)
- Get the row using
- function, we can get the sheet either using the name or by index, the index starts from 0
getRow(rowNumber)
- Get the cell number from the row using the
- from the sheet object and pass the row number you want to read s parameter
- function and print it
Retrieving Cell values by CellType
We can retrieve cell value using stringCellValue method but it only works for String values. In actual, day to day activities, we may store more types of data in excel sheets like Number, boolean, strings.
We have different properties to retrieve different types of data in apache poi
To retrieve different data, you may check each cell’s type and then retrieve its value using various type-specific methods.
You should understand that below properties will not extract a type of data from the cell when you store a particular data type in the cell then the total cell is of that type
So these properties will fetch total value present in the cell
- booleanCellValue — To fetch boolean data from the excel
- stringCellValue — To fetch String data from the excel
- dateCellValue — fetches date values from the cell
- numericCellValue — fetches numeric value
- cellFormula — fetches the data from the formula cell.
Read all values from a specific Column
We can fetch all the data from a specific column in apache poi, here we should not change the column number. The column is specified by the cell in apache POI. We have our column number ready but we have to get the number of rows present in the excel sheet so that we would know how much we have to iterate.
Using While Loop
I hope you know that the last row number would give us the number of rows present in the excel.
We can get number of rows using the lastRowNumber property from Cell object and we can use the while loop to get all the values
4sh/retable
Use Git or checkout with SVN using the web URL.
Work fast with our official CLI. Learn more.
Sign In Required
Please sign in to use Codespaces.
Launching GitHub Desktop
If nothing happens, download GitHub Desktop and try again.
Launching GitHub Desktop
If nothing happens, download GitHub Desktop and try again.
Launching Xcode
If nothing happens, download Xcode and try again.
Launching Visual Studio Code
Your codespace will open once ready.
There was a problem preparing your codespace, please try again.
Latest commit
Git stats
Files
Failed to load latest commit information.
README.md
retable is a Kotlin library to work with tabular data files (csv, excel, open document)
Under the hood it uses Apache commons csv for CSV and Apache POI for Excel / OpenDocument, and expose them with a common and simple API.
retable is still very young, and currently has a very limited set of feature, but more are coming.
Hint: see src/test/resources/examples for data files
Basic Usage (CSV)
Reading a CSV file is very straightforward
Basic Usage (Excel)
Reading an Excel file is equally simple, and except some configuration options (see later) the API is exactly the same as with CSV!
Accessing column names
By default retable reads column information from file header, and you can access to these columns
Accessing information about the record
On each record you have access to some meta information and to the raw data (list of string) of the record
Much more powerful usage can be obtained by defining the expected columns. Providing their index (1 based), their names, and their type, you can then access to the data of each column on each record in a type safe way.
By default retable validates the format for typed columns (such as int columns). You can also set up additional constraints that are checked by retable while reading the records.
Источник
Русские Блоги
Upload Or Download Excel(.xls/.xlsx) File In Kotlin II
Последняя статья описывает, как экспортировать шаблоны. Давайте поговорим о том, как писать данные, используя шаблон, который также может поддерживать пользовательские свойства, так называемые пользовательские свойства, вы можете использовать пользователей (данные), добавить дополнительное значение атрибута (не Поле атрибута определения шаблона), расширенная целостность и добавка данных. Пользовательские атрибуты должны быть объявлены в классе класса и отражать или помечены в клавише / значение, избегая производительности рефлексивности. Хорошо.
Класс данных импорта должен наследовать Baseadditionalattrs, целью этого класса — хранить дополнительные свойства и значения, определенные пользователем. Используйте Котлин здесь с ямой, Kotlin
Непустая безопасность. Элементы исполнительных элементов Formach не могут быть нулевыми, в то время как клетки не значат, определение исходного кода возвращает NULL:
Тем не менее, возвращение пересечений Kotlin не пусто, и не будет значения устройства, то есть появится следующая карта Mapper, и значение будет запутано. Поэтому используйте регулярные для цикла, чтобы прочитать индекс и Определите возвращаемое значение, чтобы вернуть нулю.
Интеллектуальная рекомендация

Проверка полномочий на основе JWT и фактические боевые учения
Предисловие: Большинство систем, за исключением большинства финансовых систем, требуют строгой системы безопасности (такой как shiro), общие требования к безопасности системы не очень высоки, требуетс.

[Android Development Fast Getsing] Запустите стойку регистрации приложения для подсказки для тостов
1. Реализуйте переднюю и заднюю часть приложения Цель:Чтобы снять риск захвата интерфейса Android, сообщите пользователям, что приложение работает в фоновом режиме. Обычно нажимает клавишу Home, чтобы.
Установите Raspberry Pi из Raspberry Pi в беспроводной маршрутизатор (Wi -Fi Hotspot AP, RTL8188CUS Chip)
Эта статья основана на USB Wireless Network Card (RTL8188CUS Chip), приобретенной на определенном востоке, чтобы создать беспроводные горячие точки. Первоначально я хотел сделать один сценарий. Просто.

[Серия исходного кода Java] строка (2) Проблема нового, а не новой
Серия строк: 【Серия исходного кода Java】 строка (1) под анализом базовой структуры [Серия исходного кода Java] строка (2) Проблема нового, а не новой [Серия исходного кода Java] Строка (3) Общий анали.

05-Vue News Mobile Project
1 Javascri не добавляет при добавлении толстой кишки При получении и изменении атрибутов реквизит плюс this. $router.push( ) 2 Axios Установка и использование Цитата в main.js 2.1axios, чтобы отправит.
Вам также может понравиться
1008 Рассматривая задача Element Element Cycle (20 баллов)
Массив A содержит n (> 0) целое число, не позволяя использовать дополнительные массивы, чтобы повернуть каждое целое число в положение правого m (≥0), данные в (A 0) A1 ⋯ A N-1) (An-M ⋯ A N-1 A .

Linux centos7 виртуальная машина установить Docker (5) —. Netcore
Текущая версия: версия Docker (например, Docker 17.03.2) .netcore версия 3.1 1 Постройте зеркало 2 запустить зеркало 3 Доступ Введите контейнер Nginx: Посещение в контейнере Выйдите из контейнера, что.

Разработать интерфейс мониторинга состояния здоровья
1. Требование Интерфейс должен содержать логическую обработку и чтение базы данных. 2. Реализация 1) Разработать доступ к интерфейсу к базе данных, успешный доступ, код статуса возврата 200, ненормаль.
[Реабилитация] #C Language Array Joseph Проблема
Я не двигал код в течение года. Теперь мой мозг не хорош, я использовал глупость, чтобы решить проблему Йозефа кольца. Написание здесь является запись, которая спасает свой собственный беспорядок. Воп.
Источник
In this tutorial, we’re gonna look at Kotlin examples that read and write Excel file using Apache POI.
I. Dependency
<dependency>
	<groupId>org.jetbrains.kotlin</groupId>
	<artifactId>kotlin-stdlib</artifactId>
	<version>1.2.21</version>
</dependency>

<dependency>
	<groupId>org.apache.poi</groupId>
	<artifactId>poi-ooxml</artifactId>
	<version>3.17</version>
</dependency>
II. Write Data to Excel File
– Simple POJO Customer (id, name, address, age):
package com.javasampleapproach.kotlin.apachecsv

class Customer {
	var id: String? = null
	var name: String? = null
	var address: String? = null
	var age: Int = 0

	constructor() {}
	constructor(id: String?, name: String?, address: String?, age: Int) {
		this.id = id
		this.name = name
		this.address = address
		this.age = age
	}

	override fun toString(): String {
		return "Customer [id=" + id + ", name=" + name + ", address=" + address + ", age=" + age + "]"
	}
}
– Write to Excel file:
package com.javasampleapproach.kotlin.apachecsv

import java.io.FileOutputStream
import java.io.IOException
import java.util.Arrays
import org.apache.poi.ss.usermodel.Cell
import org.apache.poi.ss.usermodel.CellStyle
import org.apache.poi.ss.usermodel.CreationHelper
import org.apache.poi.ss.usermodel.Font
import org.apache.poi.ss.usermodel.IndexedColors
import org.apache.poi.ss.usermodel.Row
import org.apache.poi.ss.usermodel.Sheet
import org.apache.poi.ss.usermodel.Workbook
import org.apache.poi.xssf.usermodel.XSSFWorkbook

private val COLUMNs = arrayOf("Id", "Name", "Address", "Age")
private val customers = Arrays.asList(
		Customer("1", "Jack Smith", "Massachusetts", 23),
		Customer("2", "Adam Johnson", "New York", 27),
		Customer("3", "Katherin Carter", "Washington DC", 26),
		Customer("4", "Jack London", "Nevada", 33),
		Customer("5", "Jason Bourne", "California", 36))

@Throws(IOException::class)
fun main(args: Array?) {

	val workbook = XSSFWorkbook()
	val createHelper = workbook.getCreationHelper()

	val sheet = workbook.createSheet("Customers")

	val headerFont = workbook.createFont()
	headerFont.setBold(true)
	headerFont.setColor(IndexedColors.BLUE.getIndex())

	val headerCellStyle = workbook.createCellStyle()
	headerCellStyle.setFont(headerFont)

	// Row for Header
	val headerRow = sheet.createRow(0)

	// Header
	for (col in COLUMNs.indices) {
		val cell = headerRow.createCell(col)
		cell.setCellValue(COLUMNs[col])
		cell.setCellStyle(headerCellStyle)
	}

	// CellStyle for Age
	val ageCellStyle = workbook.createCellStyle()
	ageCellStyle.setDataFormat(createHelper.createDataFormat().getFormat("#"))

	var rowIdx = 1
	for (customer in customers) {
		val row = sheet.createRow(rowIdx++)
		row.createCell(0).setCellValue(customer.id)
		row.createCell(1).setCellValue(customer.name)
		row.createCell(2).setCellValue(customer.address)
		val ageCell = row.createCell(3)
		ageCell.setCellValue(customer.age.toDouble())
		ageCell.setCellStyle(ageCellStyle)
	}

	val fileOut = FileOutputStream("customers.xlsx")
	workbook.write(fileOut)
	fileOut.close()
	workbook.close()
}
– Check results in customers.xlsx:

III. Read Data from Excel File
package com.javasampleapproach.kotlin.apachecsv

import java.io.File
import java.io.FileInputStream
import java.io.IOException
import org.apache.poi.ss.usermodel.Cell
import org.apache.poi.ss.usermodel.CellType
import org.apache.poi.ss.usermodel.Row
import org.apache.poi.ss.usermodel.Sheet
import org.apache.poi.ss.usermodel.Workbook
import org.apache.poi.xssf.usermodel.XSSFWorkbook

@Throws(IOException::class)
fun main(args: Array?) {

	val excelFile = FileInputStream(File("customers.xlsx"))
	val workbook = XSSFWorkbook(excelFile)

	val sheet = workbook.getSheet("Customers")
	val rows = sheet.iterator()
	while (rows.hasNext()) {
		val currentRow = rows.next()
		val cellsInRow = currentRow.iterator()
		while (cellsInRow.hasNext()) {
			val currentCell = cellsInRow.next()
			if (currentCell.getCellTypeEnum() === CellType.STRING) {
				print(currentCell.getStringCellValue() + " | ")
			} else if (currentCell.getCellTypeEnum() === CellType.NUMERIC) {
				print(currentCell.getNumericCellValue().toString() + "(numeric)")
			}
		}

		println()
	}

	workbook.close()
	excelFile.close()
}
– Check Result in Console:
Id | Name | Address | Age |
1 | Jack Smith | Massachusetts | 23.0(numeric)
2 | Adam Johnson | New York | 27.0(numeric)
3 | Katherin Carter | Washington DC | 26.0(numeric)
4 | Jack London | Nevada | 33.0(numeric)
5 | Jason Bourne | California | 36.0(numeric)

In this article, I would like to show you how to generate Excel reports in the .xls and .xlsx formats (also known as Open XML) in a Spring Boot REST API with Apache POI and Kotlin.
After finishing this guide, you will have a fundamental understanding of how to create custom cells formats, styles, and fonts. In the end, I will show you how to create Spring Boot REST endpoints so you can easily download generated files.
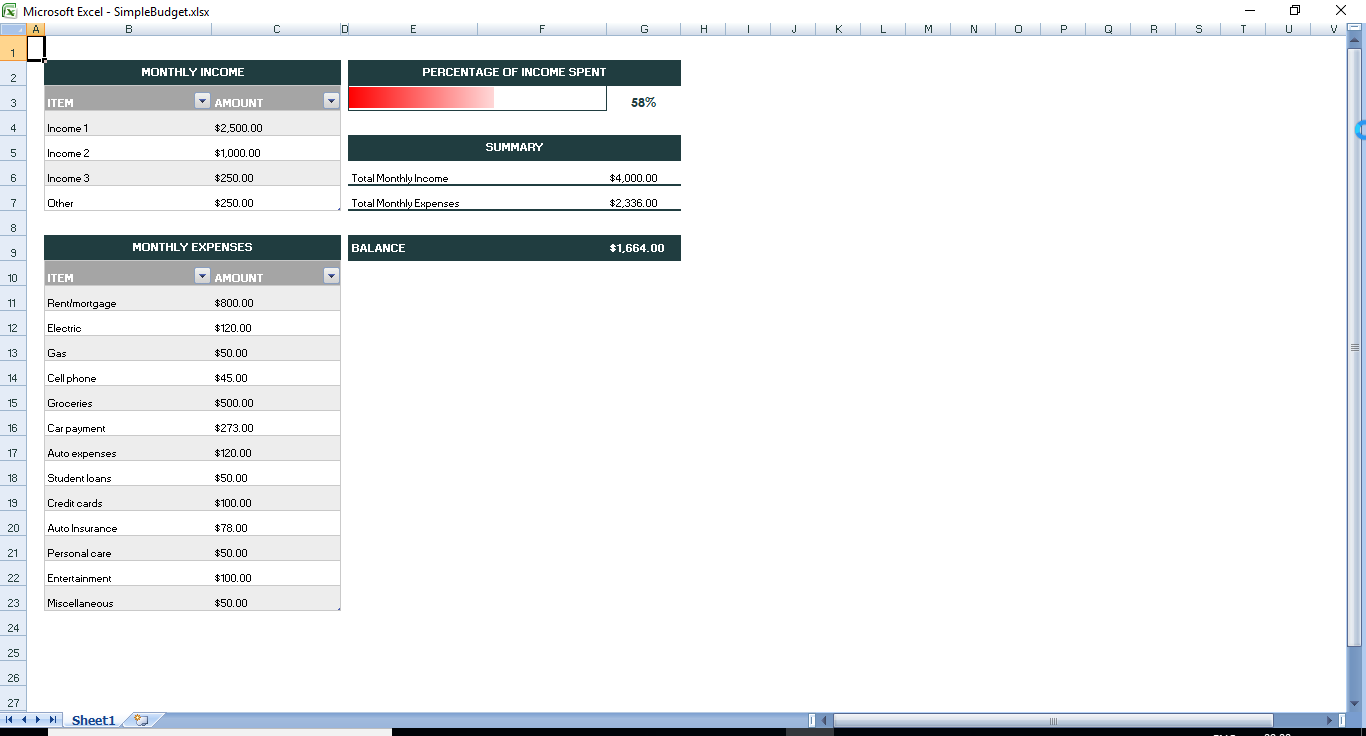
To better visualize what we’ll learn, check out the preview of the resulting file:

Step 1: Add the Necessary Imports
As the first step, let’s create a Spring Boot project (I highly recommend using the Spring Initializr page) and add the following imports:
implementation("org.springframework.boot:spring-boot-starter-web")
implementation("org.apache.poi:poi:4.1.2")
implementation("org.apache.poi:poi-ooxml:4.1.2")
Let me explain the purpose of each library:
- The Spring Boot Starter Web is necessary to create the REST API in our application.
- The Apache POI is a complex Java library for working with Excel files. If we would like to work only with the .xls format, then the poi import would be enough. In our case, we would like to add the support for the .xlsx format, so the poi-ooxml component is necessary as well.
Step 2: Create the Models
As the next step, let’s create an enum class called CustomCellStyle with 4 constants:
enum class CustomCellStyle {
    GREY_CENTERED_BOLD_ARIAL_WITH_BORDER,
    RIGHT_ALIGNED,
    RED_BOLD_ARIAL_WITH_BORDER,
    RIGHT_ALIGNED_DATE_FORMAT
}
Although the purpose of this enum class might seem a bit enigmatic at the moment, it will all become clear in the next sections.
Step 3: Prepare Cells Styles
The Apache POI library comes with the CellStyle interface, which we can use to define custom styling and formatting within rows, columns, and cells.
Let’s create a StylesGenerator component, which will be responsible for preparing a map containing our custom styles:
@Component
class StylesGenerator {

    fun prepareStyles(wb: Workbook): Map<CustomCellStyle, CellStyle> {
        val boldArial = createBoldArialFont(wb)
        val redBoldArial = createRedBoldArialFont(wb)

        val rightAlignedStyle = createRightAlignedStyle(wb)
        val greyCenteredBoldArialWithBorderStyle =
            createGreyCenteredBoldArialWithBorderStyle(wb, boldArial)
        val redBoldArialWithBorderStyle =
            createRedBoldArialWithBorderStyle(wb, redBoldArial)
        val rightAlignedDateFormatStyle =
            createRightAlignedDateFormatStyle(wb)

        return mapOf(
            CustomCellStyle.RIGHT_ALIGNED to rightAlignedStyle,
            CustomCellStyle.GREY_CENTERED_BOLD_ARIAL_WITH_BORDER to greyCenteredBoldArialWithBorderStyle,
            CustomCellStyle.RED_BOLD_ARIAL_WITH_BORDER to redBoldArialWithBorderStyle,
            CustomCellStyle.RIGHT_ALIGNED_DATE_FORMAT to rightAlignedDateFormatStyle
        )
    }
}
As you can see, with this approach, we create each style once and put it inside a map so that we will be able to refer to it later.
There are plenty of design techniques which we could use here, but I believe using a map and enum constants is one of the best ways to keep the code cleaner and easier to modify.
With that being said, let’s add some missing functions inside the generator class. Let’s start with custom fonts first:
private fun createBoldArialFont(wb: Workbook): Font {
    val font = wb.createFont()
    font.fontName = "Arial"
    font.bold = true
    return font
}
The createBoldArialFont function creates a new bold Arial Font instance, which we will use later.
Similarly, let’s implement a createRedBoldArialFont function and set the font color to red:
private fun createRedBoldArialFont(wb: Workbook): Font {
    val font = wb.createFont()
    font.fontName = "Arial"
    font.bold = true
    font.color = IndexedColors.RED.index
    return font
}
After that, we can add other functions responsible for creating individual CellStyle instances:
private fun createRightAlignedStyle(wb: Workbook): CellStyle {
    val style: CellStyle = wb.createCellStyle()
    style.alignment = HorizontalAlignment.RIGHT
    return style
}

private fun createBorderedStyle(wb: Workbook): CellStyle {
    val thin = BorderStyle.THIN
    val black = IndexedColors.BLACK.getIndex()
    val style = wb.createCellStyle()
    style.borderRight = thin
    style.rightBorderColor = black
    style.borderBottom = thin
    style.bottomBorderColor = black
    style.borderLeft = thin
    style.leftBorderColor = black
    style.borderTop = thin
    style.topBorderColor = black
    return style
}

private fun createGreyCenteredBoldArialWithBorderStyle(wb: Workbook, boldArial: Font): CellStyle {
    val style = createBorderedStyle(wb)
    style.alignment = HorizontalAlignment.CENTER
    style.setFont(boldArial)
    style.fillForegroundColor = IndexedColors.GREY_25_PERCENT.getIndex();
    style.fillPattern = FillPatternType.SOLID_FOREGROUND;
    return style
}

private fun createRedBoldArialWithBorderStyle(wb: Workbook, redBoldArial: Font): CellStyle {
    val style = createBorderedStyle(wb)
    style.setFont(redBoldArial)
    return style
}

private fun createRightAlignedDateFormatStyle(wb: Workbook): CellStyle {
    val style = wb.createCellStyle()
    style.alignment = HorizontalAlignment.RIGHT
    style.dataFormat = 14
    return style
}
Please keep in mind that the above examples represent only a small part of CellStyle’s possibilities. If you would like to see the full list, please refer to the official documentation here.
Step 4: Create the ReportService Class
As the next step, let’s implement a ReportService class responsible for creating .xlsx and .xls files and returning them as ByteArray instances:
@Service
class ReportService(
    private val stylesGenerator: StylesGenerator
) {
    fun generateXlsxReport(): ByteArray {
        val wb = XSSFWorkbook()

        return generateReport(wb)
    }

    fun generateXlsReport(): ByteArray {
        val wb = HSSFWorkbook()

        return generateReport(wb)
    }
 }
As you can see, the only difference between these two formats’ generation is the type of Workbook implementation we’ve. used. For the .xlsx format we will use the XSSFWorkbook class, and for the .xls we will use HSSFWorkbook.
Let’s add the rest of the code to the ReportService:
private fun generateReport(wb: Workbook): ByteArray {
    val styles = stylesGenerator.prepareStyles(wb)
    val sheet: Sheet = wb.createSheet("Example sheet name")

    setColumnsWidth(sheet)

    createHeaderRow(sheet, styles)
    createStringsRow(sheet, styles)
    createDoublesRow(sheet, styles)
    createDatesRow(sheet, styles)

    val out = ByteArrayOutputStream()
    wb.write(out)

    out.close()
    wb.close()

    return out.toByteArray()
}

private fun setColumnsWidth(sheet: Sheet) {
    sheet.setColumnWidth(0, 256 * 20)

    for (columnIndex in 1 until 5) {
        sheet.setColumnWidth(columnIndex, 256 * 15)
    }
}

private fun createHeaderRow(sheet: Sheet, styles: Map<CustomCellStyle, CellStyle>) {
    val row = sheet.createRow(0)

    for (columnNumber in 1 until 5) {
        val cell = row.createCell(columnNumber)

        cell.setCellValue("Column $columnNumber")
        cell.cellStyle = styles[CustomCellStyle.GREY_CENTERED_BOLD_ARIAL_WITH_BORDER]
    }
}

private fun createRowLabelCell(row: Row, styles: Map<CustomCellStyle, CellStyle>, label: String) {
    val rowLabel = row.createCell(0)
    rowLabel.setCellValue(label)
    rowLabel.cellStyle = styles[CustomCellStyle.RED_BOLD_ARIAL_WITH_BORDER]
}

private fun createStringsRow(sheet: Sheet, styles: Map<CustomCellStyle, CellStyle>) {
    val row = sheet.createRow(1)
    createRowLabelCell(row, styles, "Strings row")

    for (columnNumber in 1 until 5) {
        val cell = row.createCell(columnNumber)

        cell.setCellValue("String $columnNumber")
        cell.cellStyle = styles[CustomCellStyle.RIGHT_ALIGNED]
    }
}

private fun createDoublesRow(sheet: Sheet, styles: Map<CustomCellStyle, CellStyle>) {
    val row = sheet.createRow(2)
    createRowLabelCell(row, styles, "Doubles row")

    for (columnNumber in 1 until 5) {
        val cell = row.createCell(columnNumber)

        cell.setCellValue(BigDecimal("${columnNumber}.99").toDouble())
        cell.cellStyle = styles[CustomCellStyle.RIGHT_ALIGNED]
    }
}

private fun createDatesRow(sheet: Sheet, styles: Map<CustomCellStyle, CellStyle>) {
    val row = sheet.createRow(3)
    createRowLabelCell(row, styles, "Dates row")

    for (columnNumber in 1 until 5) {
        val cell = row.createCell(columnNumber)

        cell.setCellValue((LocalDate.now()))
        cell.cellStyle = styles[CustomCellStyle.RIGHT_ALIGNED_DATE_FORMAT]
    }
}
As you can see, the first thing the generateReport function does is that it styles the initialization. We pass the Workbook instance to the StylesGenerator and in return, we get a map, which we will use later to obtain appropriate CellStyles.
After that, it creates a new sheet within our workbook and passes a name for it.
Then, it invokes functions responsible for setting the columns’ widths and operating on our sheet row by row.
Finally, it writes out our workbook to a ByteArrayOutputStream.
Let’s take a minute and analyze what exactly each function does:
private fun setColumnsWidth(sheet: Sheet) {
    sheet.setColumnWidth(0, 256 * 20)

    for (columnIndex in 1 until 5) {
        sheet.setColumnWidth(columnIndex, 256 * 15)
    }
}
As the name suggests, setColumnsWidth is responsible for setting widths of columns in our sheet. The first parameter passed to the setColumnWidth indicates the columnIndex, whereas the second one sets the width (in units of 1/256th of a character width).
private fun createRowLabelCell(row: Row, styles: Map<CustomCellStyle, CellStyle>, label: String) {
    val rowLabel = row.createCell(0)
    rowLabel.setCellValue(label)
    rowLabel.cellStyle = styles[CustomCellStyle.RED_BOLD_ARIAL_WITH_BORDER]
}
The createRowLabelCell function is responsible for adding a cell in the first column of the passed row, alongside setting its value to the specified label and setting the style. I’ve decided to add this function to slightly reduce the code’s redundancy.
All of the below functions are pretty similar. Their purpose is to create a new row, invoking the createRowLabelCell function (except for createHeaderRow) and adding five columns with data to our sheet.
private fun createHeaderRow(sheet: Sheet, styles: Map<CustomCellStyle, CellStyle>) {
    val row = sheet.createRow(0)

    for (columnNumber in 1 until 5) {
        val cell = row.createCell(columnNumber)

        cell.setCellValue("Column $columnNumber")
        cell.cellStyle = styles[CustomCellStyle.GREY_CENTERED_BOLD_ARIAL_WITH_BORDER]
    }
}
private fun createStringsRow(sheet: Sheet, styles: Map<CustomCellStyle, CellStyle>) {
val row = sheet.createRow(1)
createRowLabelCell(row, styles, "Strings row")
for (columnNumber in 1 until 5) {
val cell = row.createCell(columnNumber)
cell.setCellValue("String $columnNumber")
cell.cellStyle = styles[CustomCellStyle.RIGHT_ALIGNED]
}
}private fun createDoublesRow(sheet: Sheet, styles: Map<CustomCellStyle, CellStyle>) {
val row = sheet.createRow(2)
createRowLabelCell(row, styles, "Doubles row")
for (columnNumber in 1 until 5) {
val cell = row.createCell(columnNumber)
cell.setCellValue(BigDecimal("${columnNumber}.99").toDouble())
cell.cellStyle = styles[CustomCellStyle.RIGHT_ALIGNED]
}
}private fun createDatesRow(sheet: Sheet, styles: Map<CustomCellStyle, CellStyle>) {
val row = sheet.createRow(3)
createRowLabelCell(row, styles, "Dates row")
for (columnNumber in 1 until 5) {
val cell = row.createCell(columnNumber)
cell.setCellValue((LocalDate.now()))
cell.cellStyle = styles[CustomCellStyle.RIGHT_ALIGNED_DATE_FORMAT]
}
}Step 5: Implement the REST ReportController
As the last step, we will implement a class named ReportController. It will be responsible for handling POST requests coming to our two REST endpoints:
- /api/report/xlsx — creating a report in a .xlsx format
- /api/report/xls — same as above, but in a .xls format
@RestController
@RequestMapping("/api/report")
class ReportController(
    private val reportService: ReportService
) {

    @PostMapping("/xlsx")
    fun generateXlsxReport(): ResponseEntity<ByteArray> {
        val report = reportService.generateXlsxReport()

        return createResponseEntity(report, "report.xlsx")
    }

    @PostMapping("/xls")
    fun generateXlsReport(): ResponseEntity<ByteArray> {
        val report = reportService.generateXlsReport()

        return createResponseEntity(report, "report.xls")
    }

    private fun createResponseEntity(
        report: ByteArray,
        fileName: String
    ): ResponseEntity<ByteArray> =
        ResponseEntity.ok()
            .contentType(MediaType.APPLICATION_OCTET_STREAM)
            .header(HttpHeaders.CONTENT_DISPOSITION, "attachment; filename="$fileName"")
            .body(report)

}
The most interesting part of the above code is the createResponseEntity function, which sets the passed ByteArray with its generated report as a response body.
Additionally, we set the Content-Type header of the response as the application/octet-stream, and the Content-Disposition as the attachment; filename=<FILENAME>.
Step 6: Test Everything With Postman
Finally, we can run and test our Spring Boot application, for instance with the gradlew command:
./gradlew bootRunBy default, the Spring Boot application will be running on port 8080, so let’s open up Postman (or any other tool), specify the POST request to localhost:8080/api/report/xls and hit Send and Download button:

If everything went well, we should see a window allowing us to save the .xls file.
Similarly, let’s test the second endpoint:

This time, the file extension should be .xlsx.
Summary
That’s all for this article! We’ve covered the process of generating Excel reports in a Spring Boot REST API with Apache POI and Kotlin.
If you enjoyed it and would like to learn other topics through similar articles, please visit my blog, Codersee.
And the last thing: for the source code of a fully working project, please refer to this GitHub repository.
Learn to code for free. freeCodeCamp’s open source curriculum has helped more than 40,000 people get jobs as developers. Get started